Subscription and the website
On a SaaS install: a workspace's own subscription screen, its public website and search engines.
The Subscription screen
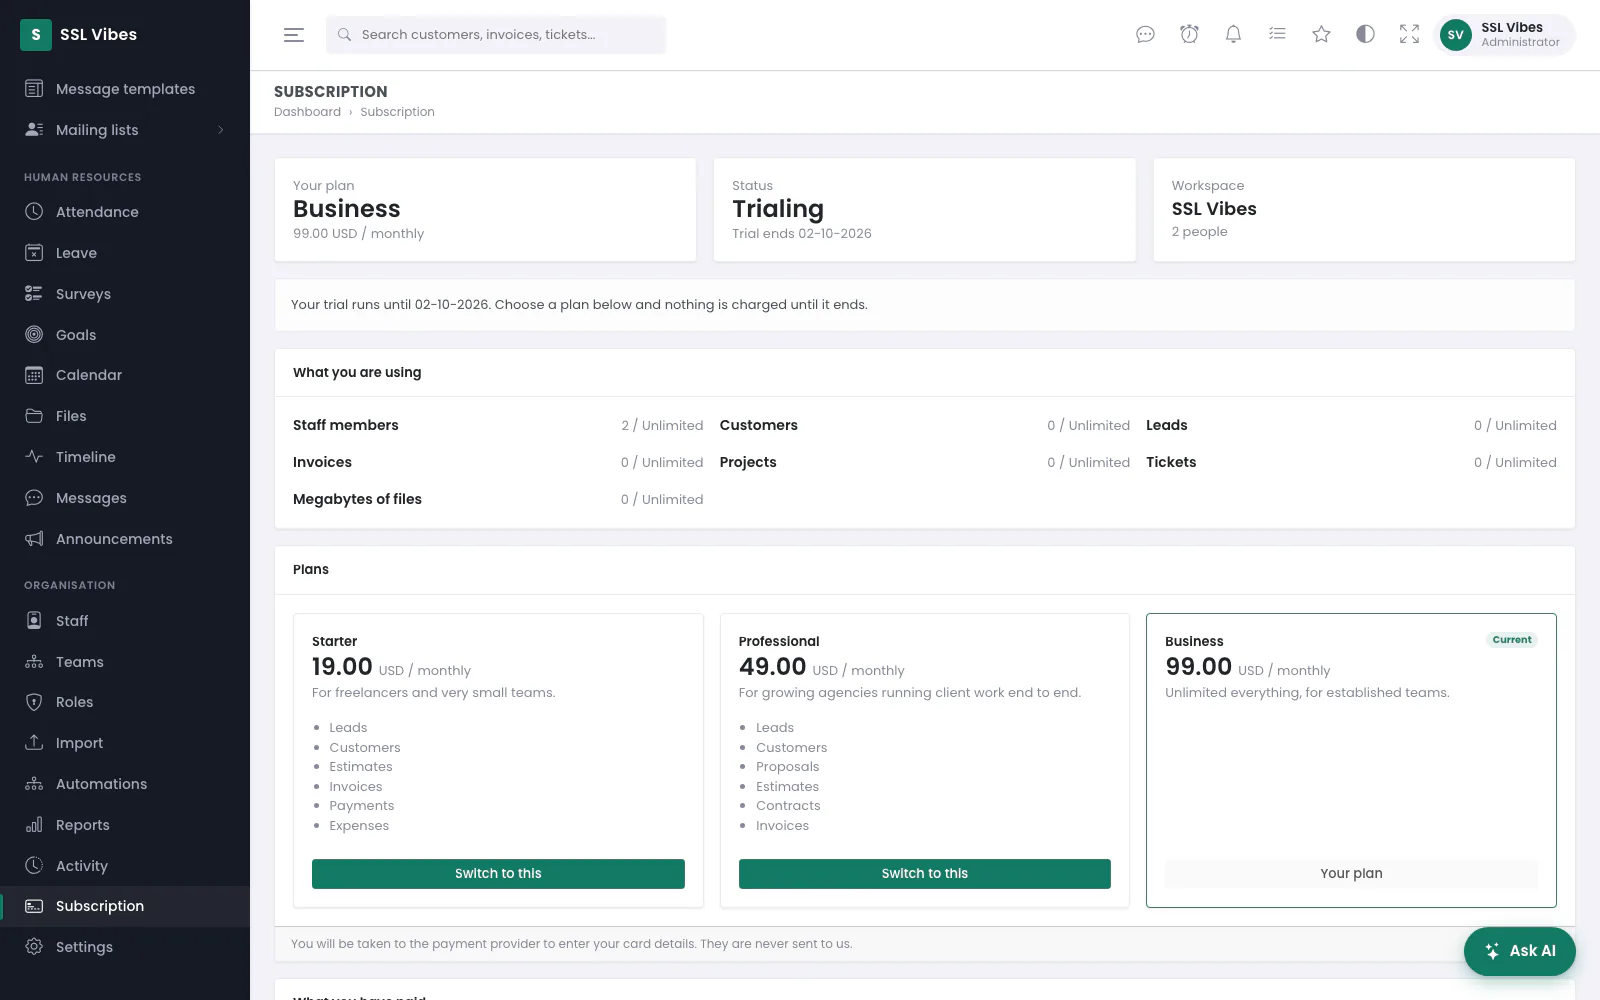 A workspace on a trial: its plan, status and size, what it uses against its limits, and the plans it could move to.
A workspace owner finds Subscription in their own sidebar, under Organisation. Only somebody who can edit settings sees it (it needs Settings → Edit), and it does not exist on a single-company install.
From the top:
- Your plan — its name and price per billing period, or Free.
- Status — Trialing, Active, Past Due and so on, with when the trial ends, when the plan renews, or when it ends if it has been cancelled.
- Workspace — its name and how many people it has.
- A banner when something needs doing: A payment did not go through for a workspace that is past due, or, during a trial with online payment set up, that nothing is charged until the trial ends.
- What you are using — staff members, customers, leads, invoices, projects, tickets and megabytes of files, each against what the plan allows. The bar turns amber at 80% and red at the limit. It is on the same screen as the plans on purpose: "you are at your limit" and "here is the plan that raises it" are one decision.
- Plans — every active public plan, with its price, description and what it includes. The current one is marked Current.
- What you have paid — the last 24 payments: when, for which plan and period, the amount, and how it arrived (the gateway, or Recorded by hand). A refunded or failed payment is badged. Only there once something has been paid.
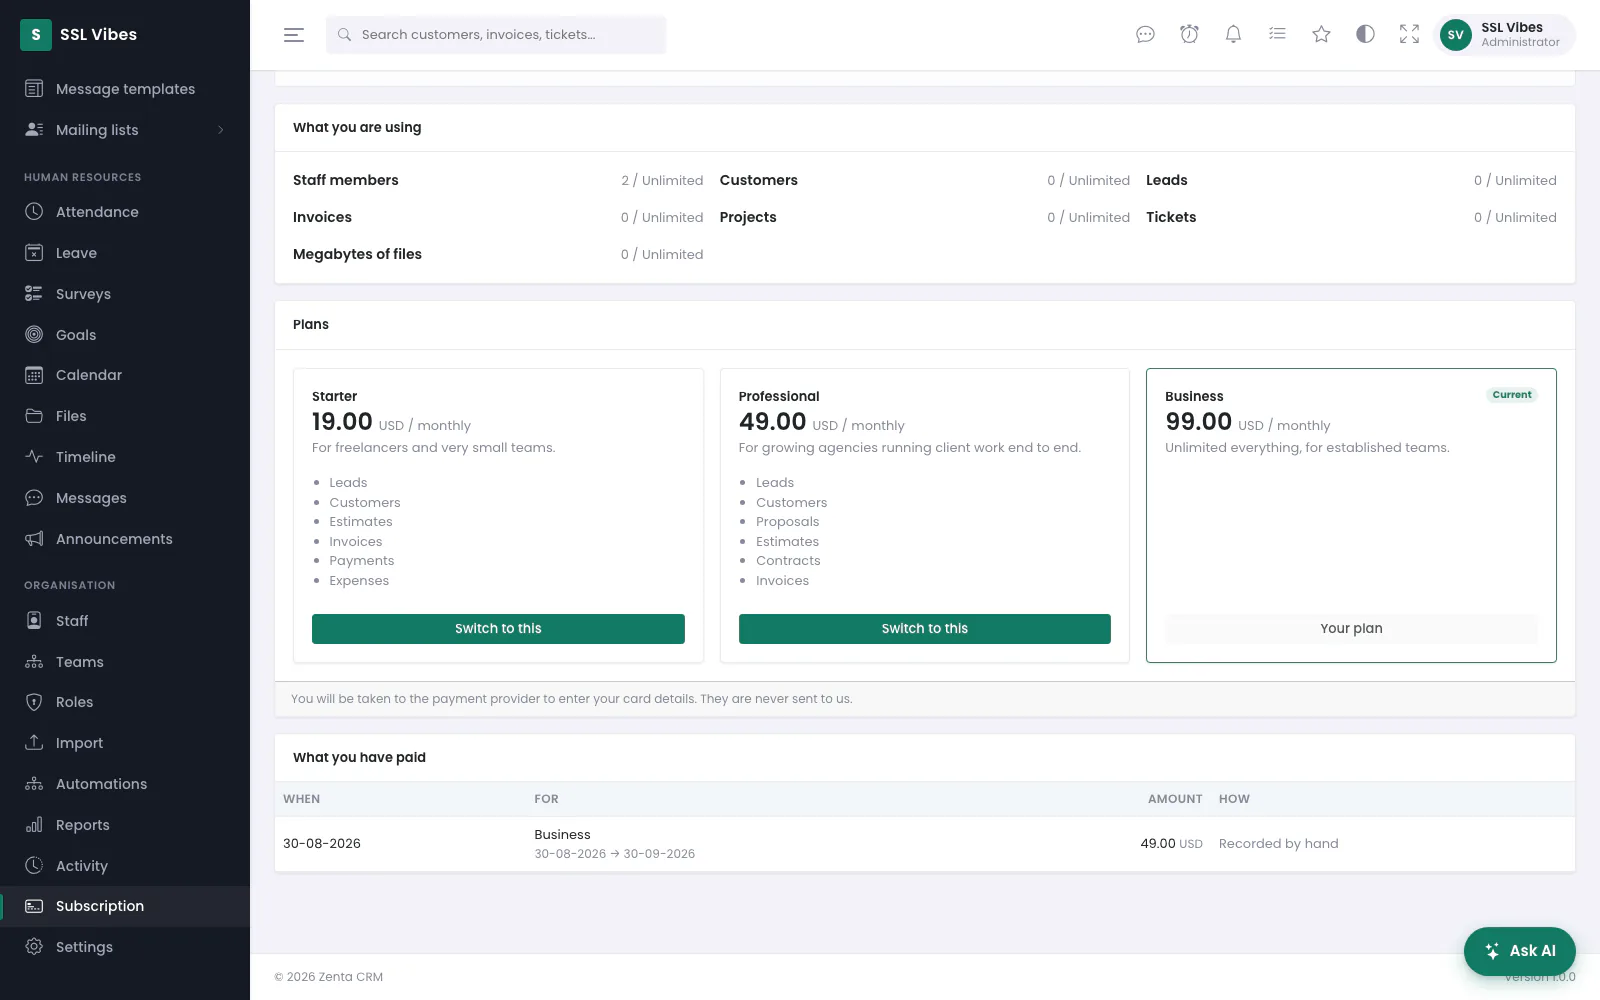 Further down: the plans, and what the workspace has paid.
Changing plan
With online payment set up by the platform (see Billing), each other plan has Switch to this (Choose this for a workspace with no plan yet). Pressing it takes the owner to the payment provider's own page to enter their card — card details are never sent to Zenta CRM — and back to the Subscription screen afterwards, where the application asks the provider directly what happened rather than believing the browser. It shows Thank you — your subscription is active only when the workspace does have a subscription; otherwise it says We have not had the payment confirmed yet. If you paid, this page will show your plan within a few minutes. That check is what covers an install whose webhook is not set up. A free plan is applied straight away, without the payment page, and confirmed as a success: That plan is free — it has been applied.
Without online payment the plans are shown with To change plan, get in touch and we will move you across, and the super admin moves the workspace by hand.
If the platform left the billing portal switched on, Manage payment at the top sends the owner to Stripe's own page to change their card, read their invoices and cancel. It saves you every "please update my card" email.
The public site
Two switches decide what a stranger finds at your root URL:
| Setting | Effect |
|---|---|
| Publish the website (Settings → Website) | Shows your front page, and on the platform's own site the pricing page, instead of the sign-in page. |
| Let companies sign themselves up (Tenant admin → Platform settings) | Lets people sign themselves up at /register. |
Signup creates the workspace, seeds its reference data, creates the owner's account and signs them straight in. The form carries a hidden honeypot field, which stops most automated signups without making anyone solve a puzzle. For the ones it does not, switch on reCAPTCHA for Workspace sign-up under Settings → Integrations — this is the most expensive form on the site to have abused, because every submission provisions a workspace and an account that can send email.
Writing the front page
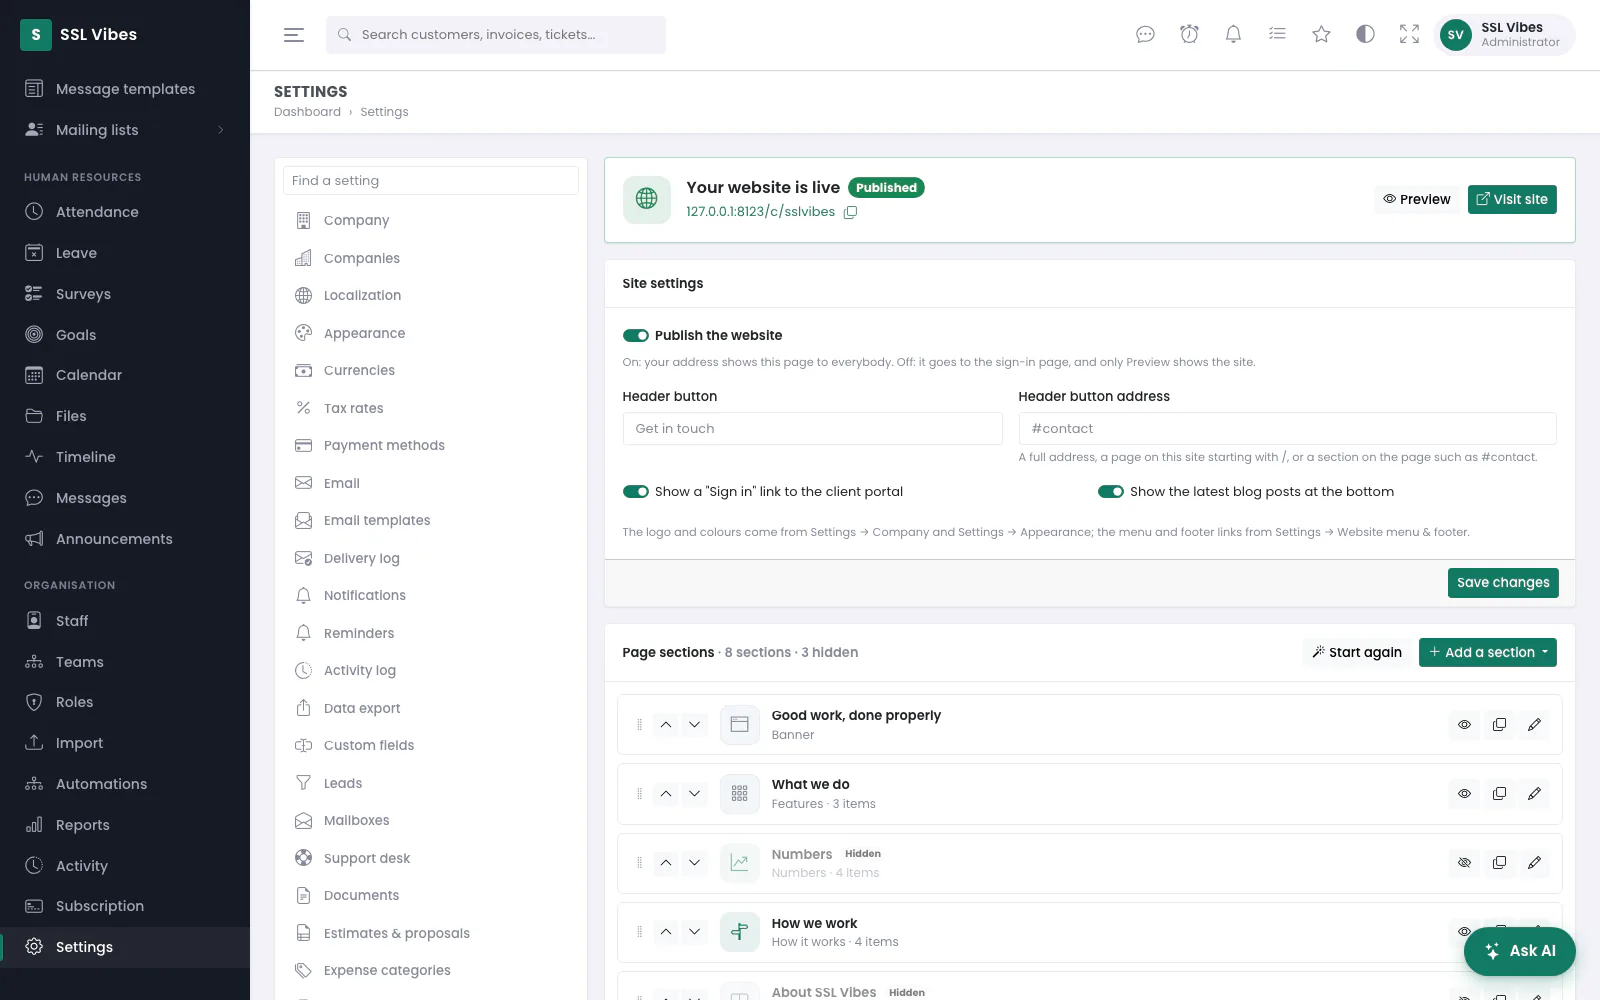 Settings → Website in a customer workspace: where the site stands, its settings, and its sections.
Settings → Website. Every workspace has a front page of its own, built on this screen, which it uses as its own business website at its subdomain or custom domain. (The platform's front page, the one that sells your plans, is built with the same builder under Tenant admin → Website; a super admin opening Settings → Website from the platform's own workspace is sent there.) The screen has four parts.
Where the site stands
Whether it is published, the address it can be reached at with a copy button, a Preview button and, once it is live, Visit site. Preview works before anything is published: it shows the page exactly as visitors will see it, with a yellow bar across the top that only you can see. A workspace reached only through the shared address, with no subdomain or custom domain, has no public site of its own; the screen says so, and Preview still shows it.
Site settings
- Publish the website — on, your address shows this page to everybody; off, it goes to the sign-in page, and only Preview shows the site.
- Header button and Header button address — the button at the right of the header. The address is a full address starting with
https://, a page on this site starting with/, or a section on the page such as#contact; anything else is refused. - Show a "Sign in" link to the client portal.
- Show the latest blog posts at the bottom.
Press Save changes. The logo is the one under Settings → Company, the colours are the accent under Settings → Appearance, and the menu, footer and social links are under Settings → Website menu & footer.
The ready-made page
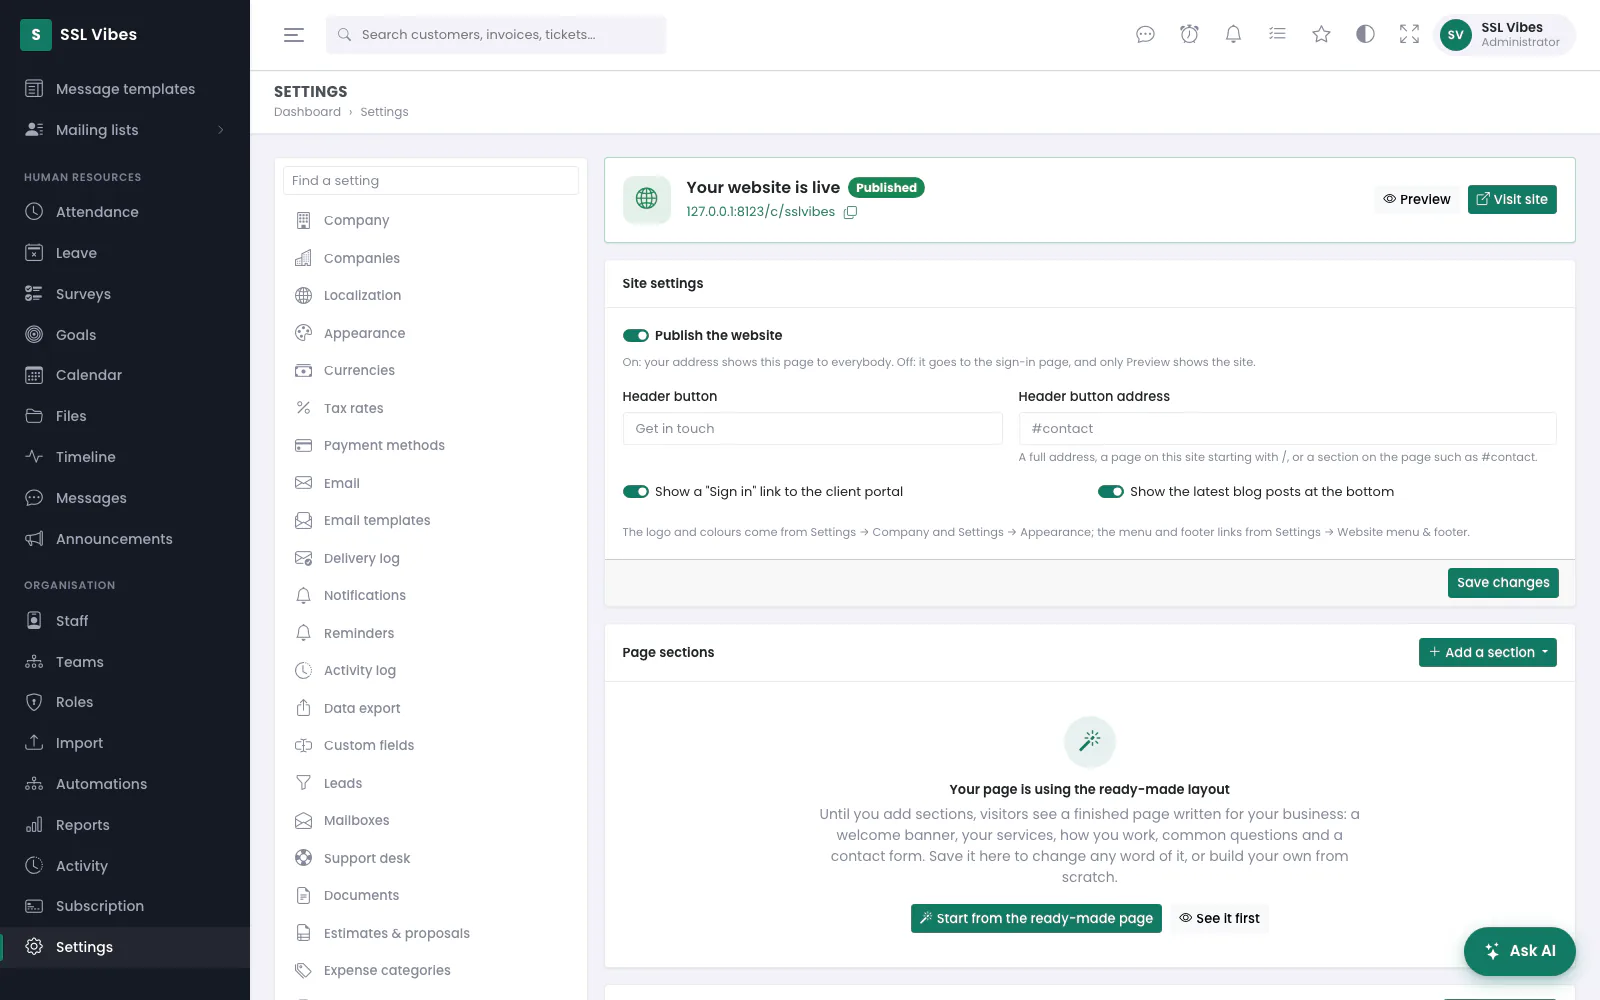 A workspace with no sections yet shows the ready-made page to visitors.
With no sections at all, visitors see a ready-made page written for the business: a welcome banner with its name, its services, how it works, common questions, a call to action and a contact section using its details from Settings → Company. See it first previews it; Start from the ready-made page saves those sections, after you confirm, so every word can be changed.
Start again, above a page that already has sections, replaces every section with the ready-made page after you confirm — the sections you have now are deleted. The ready-made sections are never laid over existing ones.
Page sections
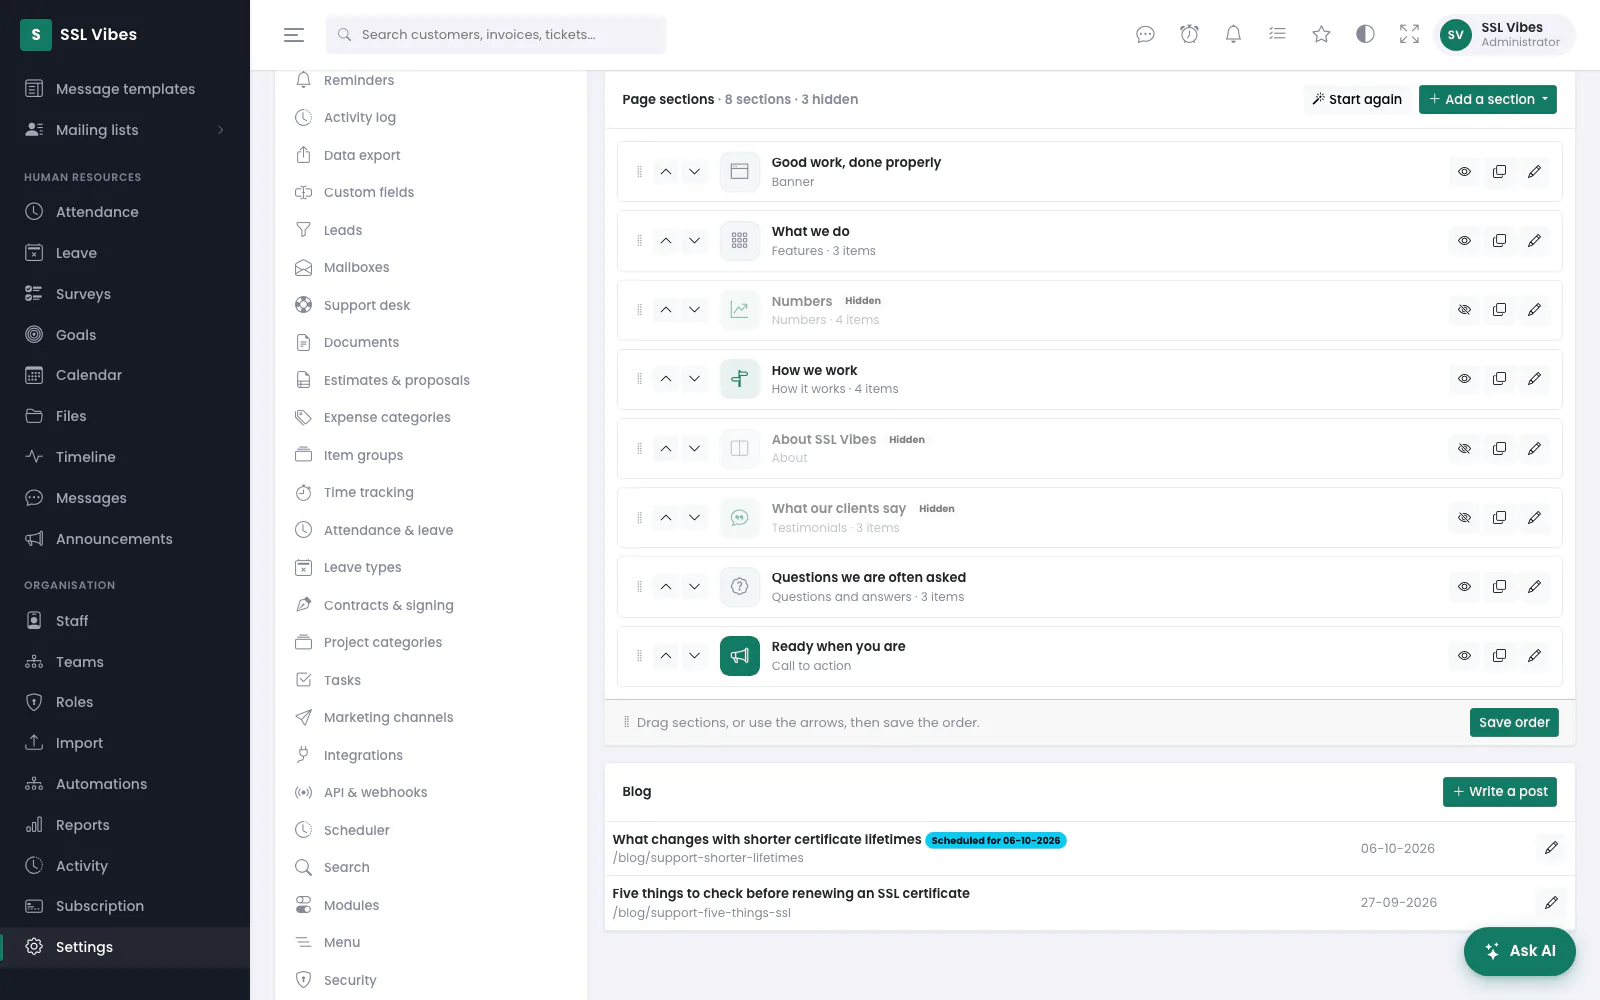 The sections, in page order, with how many there are and how many are hidden.
The page is the list of sections, top to bottom. Each row shows the section's heading, its kind and how many items it has, and whether it is Hidden. On each row:
- Reorder — drag a section by its handle, or use the up and down arrows, then press Save order. Nothing moves on the live page until you save.
- Show / Hide — takes a section off the page without deleting it, straight away.
- Copy — duplicates the section just below the original. The copy starts hidden, so you can work on a variation without the live page changing.
- Edit — opens the section's window.
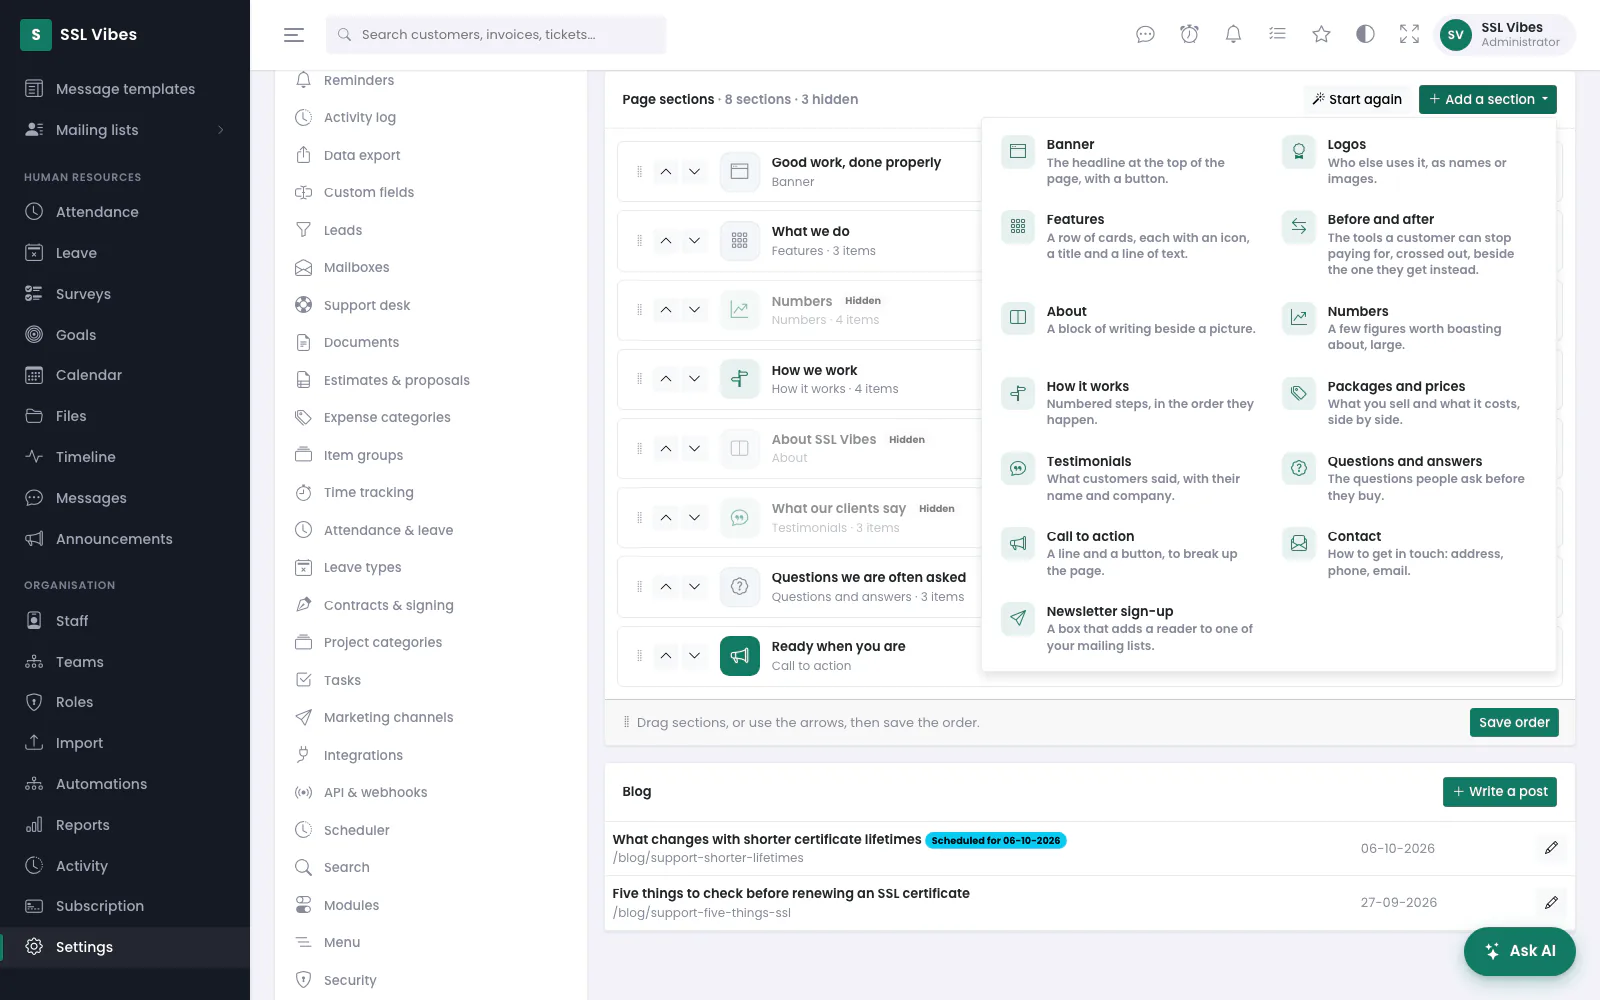 Add a section: the twelve kinds of section a page is built from.
Add a section offers twelve kinds; a new section goes at the bottom, and is dragged up from there.
| Section | What it is |
|---|---|
| Banner | The headline at the top, with up to two buttons. Centred with a picture underneath, or text beside the picture. |
| Logos | Who else uses it, as names or images. |
| Features | Cards, each with an icon, a title and a line of text. |
| About | A block of writing beside a picture, on either side. |
| Numbers | A few large figures — years in business, clients served. |
| How it works | Numbered steps, in the order they happen. |
| Packages and prices | What you sell and what it costs, with what each includes, one thing a line. One can be marked Recommended. |
| Testimonials | What customers said, with their name and company. |
| Questions and answers | The questions people ask before they buy. |
| Call to action | A line and a button, in a coloured panel. |
| Contact | Your email, phone and address — and, if you pick one, a web-to-lead form drawn right beside them, so an enquiry becomes a lead without the visitor leaving the page. |
| Newsletter sign-up | A link through to one of your mailing lists' own sign-up page. |
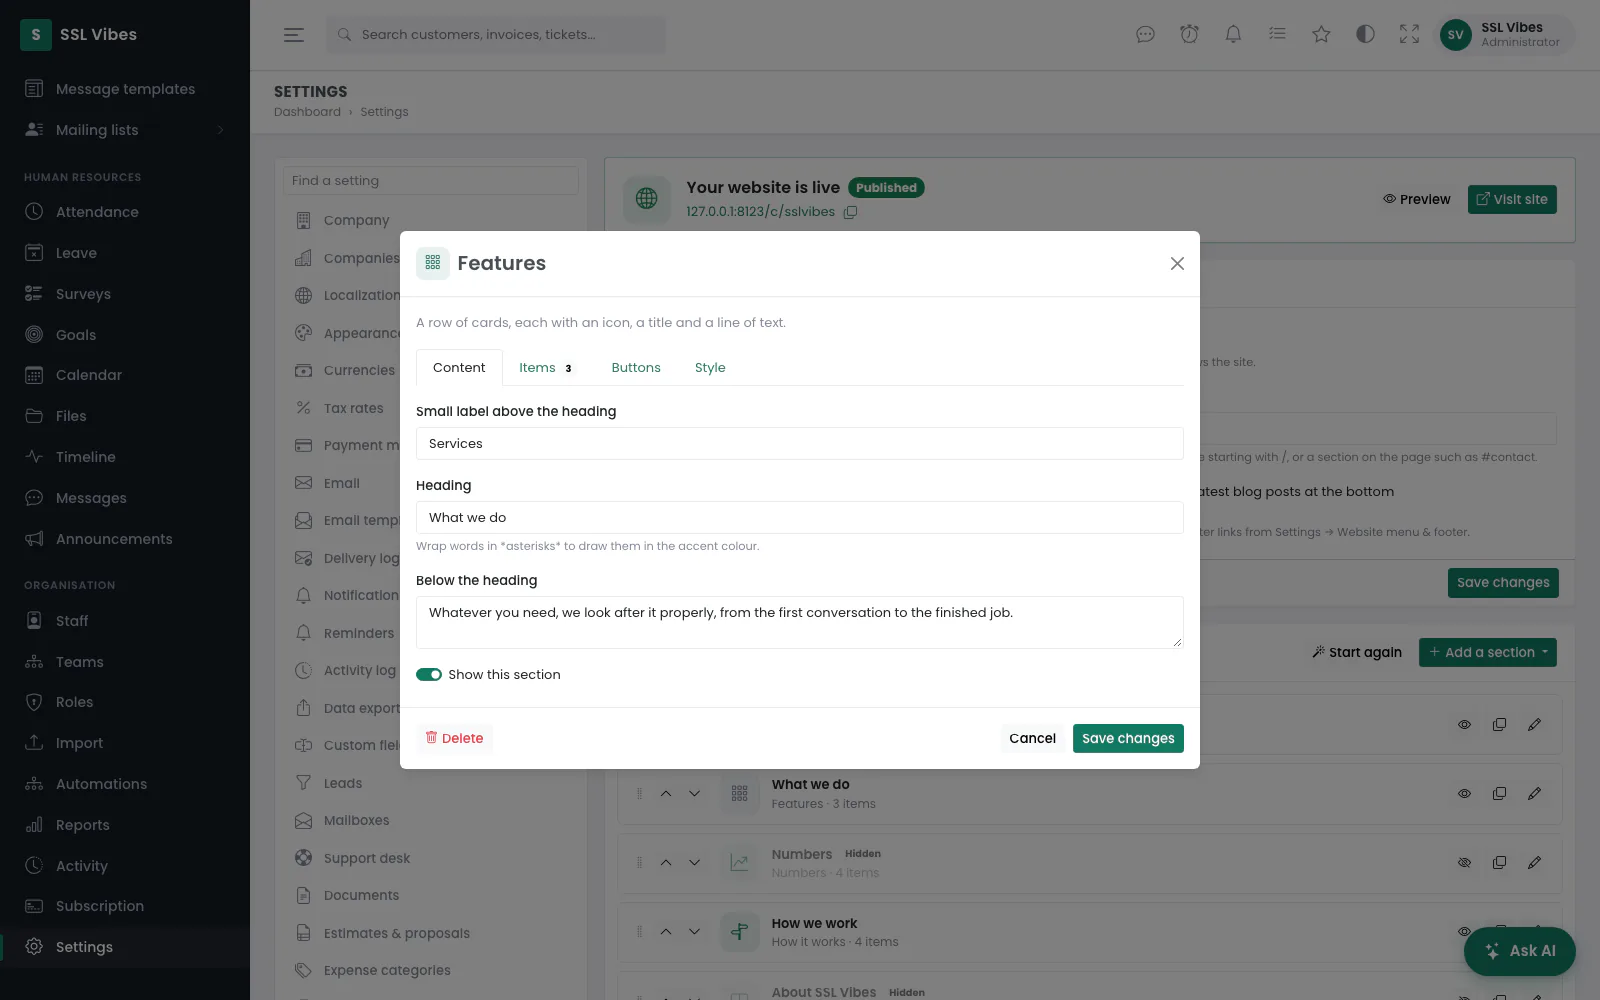 A section opens in a window with up to four tabs: Content, Items, Buttons and Style.
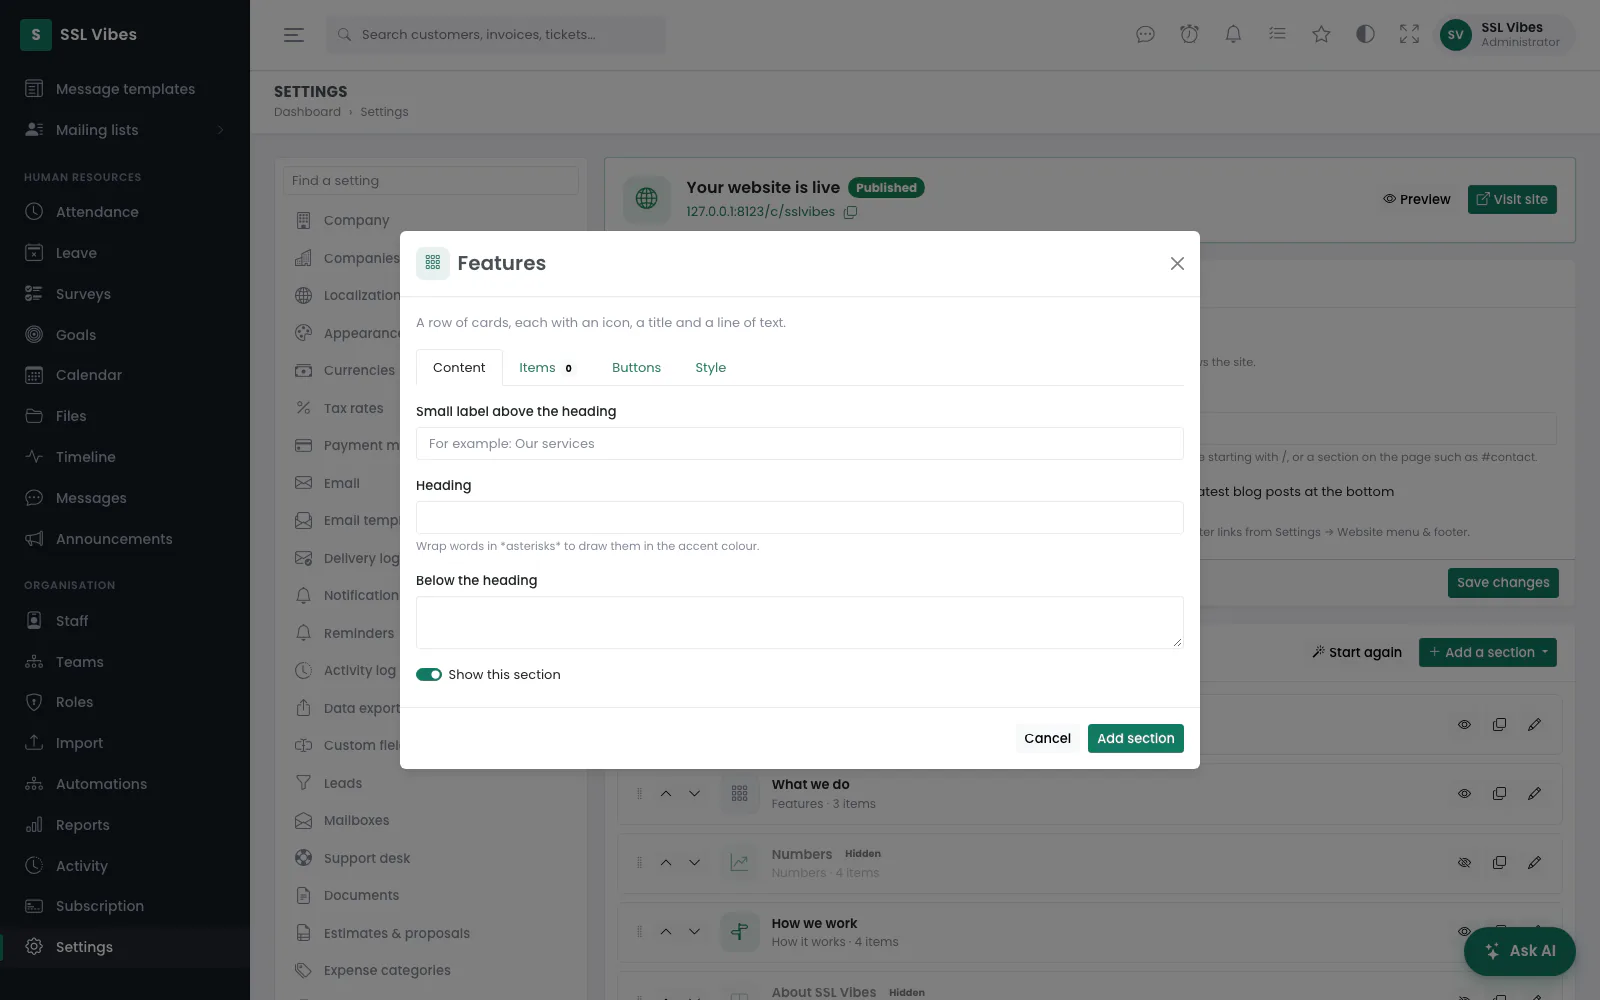 A new Features section, on its Content tab.
Each section opens in a window with up to four tabs, depending on its kind:
- Content — Small label above the heading, Heading, Below the heading, The writing (basic HTML, cleaned when it is saved) and the Picture (PNG, JPEG or WebP up to 2 MB; SVG is never accepted; Remove this picture takes it off), and Show this section.
- Items — the cards, steps, figures, questions or packages, up to 24, added with Add an item and moved or removed with the buttons on each. A row left empty is dropped when you save. An icon is a Bootstrap Icons name such as
lightbulb; a logo's image address must start withhttps://or/. - Buttons — Button and Button address, and on a banner a Second button. A button with no label or address is not shown. A package with no button of its own uses this one; a newsletter section's button goes to the sign-up page of your first public mailing list.
- Style — the Background (Plain, Tinted, Accent colour or Dark), the Layout of a banner or About section, the Recommended package, and a contact section's Contact form (None - contact details only, or one of your web-to-lead forms).
Press Add section or Save changes. Delete, at the bottom left of the window, removes the section from the front page after you confirm.
A customer workspace's site never shows the platform's plans or its sign-up form — its visitors are that business's customers — and its Sign in link goes to the customer portal. Your terms, privacy policy and anything else are pages under Settings → Pages.
The blog
 The blog, under the sections: a scheduled post and a published one.
Posts live at the bottom of Settings → Website (the latest fifty),
and read at /blog. Press Write a post, or the
on a post to change it.
 Writing a post. Leave Publish on blank to keep it a draft.
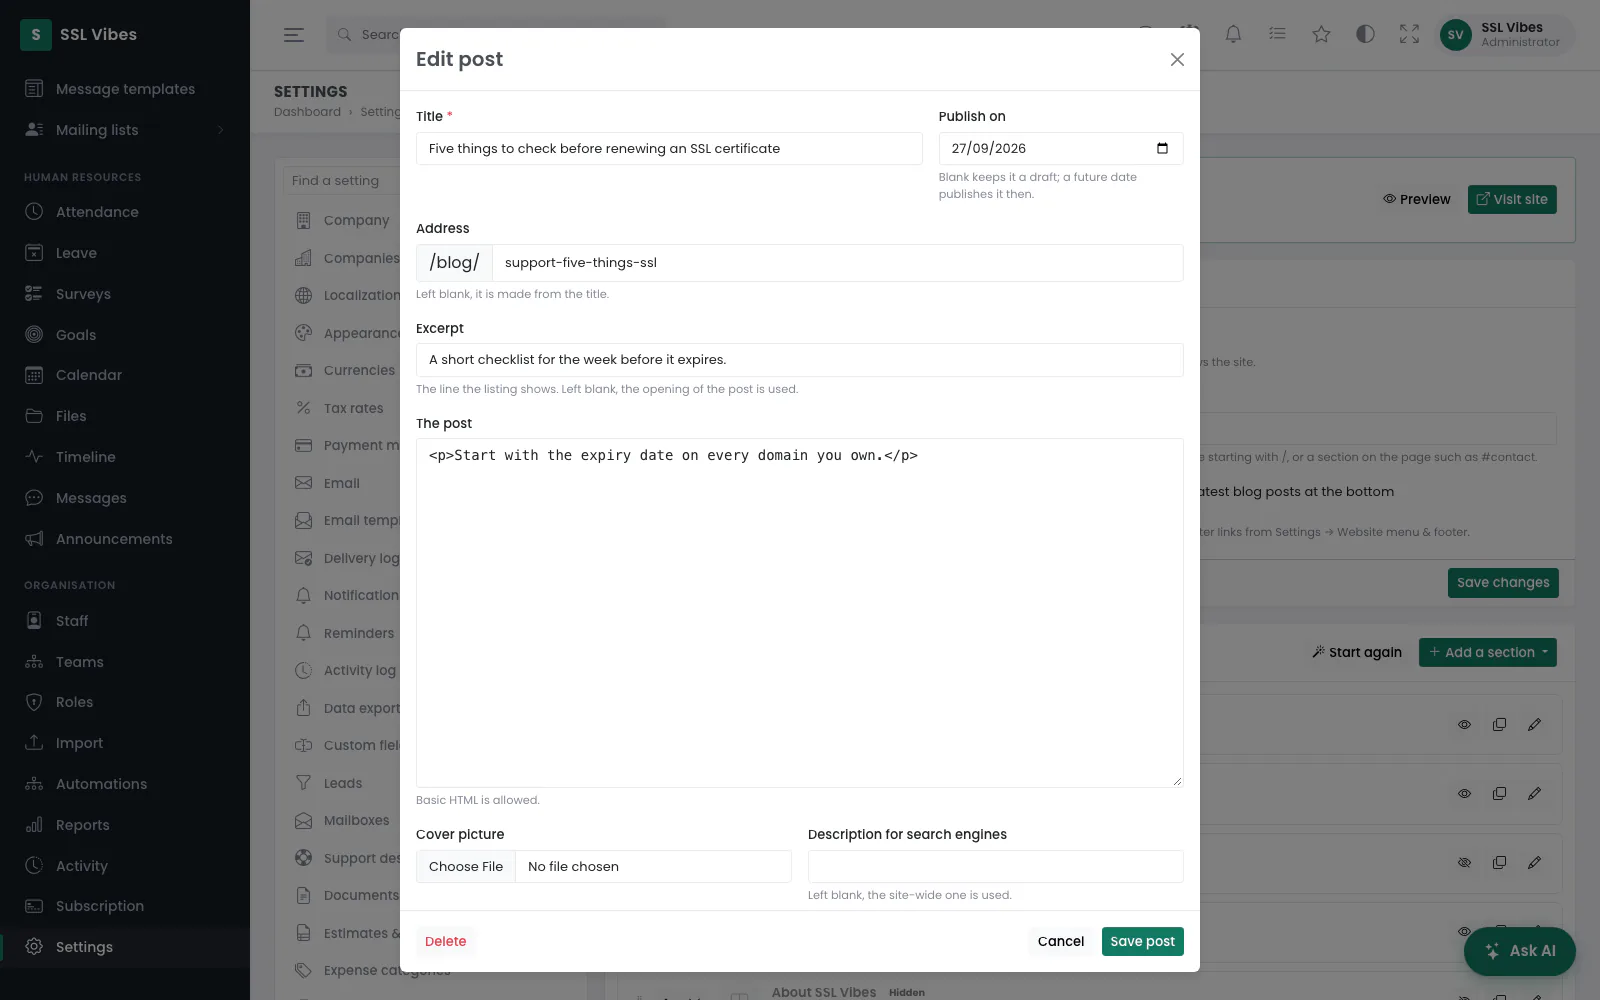 Editing a post. Delete is at the bottom left.
| Field | What it does |
|---|---|
| Title | Required. |
| Publish on | Blank keeps it a draft; a future date publishes it then, with no scheduled job to forget to run. The list badges it Draft or Scheduled for the date. |
| Address | After /blog/. Left blank, it is made from the title. |
| Excerpt | The line the listing shows. Left blank, the opening of the post is used. |
| The post | Basic HTML, cleaned when it is saved. |
| Cover picture | PNG, JPEG or WebP, up to 2 MB. |
| Description for search engines | Left blank, the site-wide one is used. |
Press Save post. Delete in the post's window removes it after you confirm. The three most recent published posts appear at the bottom of the front page unless you switch that off in Site settings.
Search engines
Settings → Search engines, and it is off as shipped. Almost every install of this is one company's private CRM, and a knowledge base full of their own answers turning up in a search result because nobody thought to check would be this product's fault rather than theirs.
Switched on, it opens up exactly the pages a visitor with no account can already read:
- The front page, pricing, the knowledge base, your public pages and the blog.
- Nothing under
/admin,/portal,/tenant/adminor/api, whatever the setting says — a page's own access rules decide, not a checkbox. - A shared document link, a payment page and a survey are never indexable either: each is addressed to one person and carries a token in the URL.
/robots.txt and /sitemap.xml are written by the application
rather than shipped as files — neither can be right until the install knows its own
address and which of its pages are public. The private areas are disallowed in
robots.txt whatever the setting says.
<meta> tag keeps meta and link elements
and drops everything else — "paste this into your head" is exactly how a tracking
script nobody reviewed ends up on every page of a site.
Addresses on this page
For reference and for anyone scripting against the panel. Everything here needs somebody signed in to the workspace whose role allows it; anybody else is refused.
| Method | Address | What it does |
|---|---|---|
GET | admin/billing | The workspace's Subscription screen. |
POST | admin/billing/checkout | Starts a subscription to the chosen plan and sends the owner to the payment provider. A free plan is applied at once. |
GET | admin/billing/complete | Where the owner lands on the way back from the payment provider: confirms the session with the provider, then returns to the Subscription screen. |
GET | admin/settings/website-content | Settings → Website. |
PUT | admin/settings/website-content/settings | Saves Site settings: published, the header button, the sign-in link and the blog posts. |
POST | admin/settings/website-content/starter | Saves the ready-made page; with replace, in place of every existing section. |
GET | admin/settings/website-content/sections/create | The new-section window, for the type asked for (a banner if none). |
POST | admin/settings/website-content/sections | Adds a section at the bottom of the page. |
GET | admin/settings/website-content/sections/{section}/edit | The edit-section window. |
PUT | admin/settings/website-content/sections/{section} | Saves a section. |
DELETE | admin/settings/website-content/sections/{section} | Deletes a section. |
PUT | admin/settings/website-content/sections/order | Saves the order of the sections. Used by the page itself (Save order). |
POST | admin/settings/website-content/sections/{section}/toggle | Shows or hides a section. |
POST | admin/settings/website-content/sections/{section}/duplicate | Copies a section, hidden, just below the original. |
GET | admin/settings/website-content/posts/create | The new-post window. |
POST | admin/settings/website-content/posts | Saves a new post. |
GET | admin/settings/website-content/posts/{post}/edit | The edit-post window. |
PUT | admin/settings/website-content/posts/{post} | Saves a post. |
DELETE | admin/settings/website-content/posts/{post} | Deletes a post. |